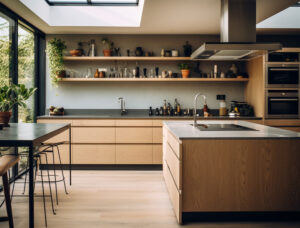


Kitchen Island Ideas: How to Design One You’ll Actually Love
Share this post:
The kitchen island has quietly become the hardest-working part of the modern Australian home. It’s where you prep dinner, where the kids do their homework, where guests gather with a glass of wine while you cook, and where the whole family lands at the end of a long day. Done well, it’s the heart of the home. Done poorly, it’s an expensive bench you shuffle around.
So how do you get it right? After more than 25 years designing and building kitchens across Melbourne, we’ve learned that a great island comes down to a handful of decisions made in the right order. Rush them, or make them out of sequence, and you end up reworking the design, or worse, living with a compromise. This guide walks you through them, from size and clearances to seating, storage, benchtops, lighting and cost, and the looks that suit different homes.
Before you think about stone or stool colours, get clear on the island’s main job. Most islands try to do a few things at once, and that’s fine, but one role should lead. For some families it’s a prep zone, with clear bench space and a sink or bin close by.
For others it’s a social hub with seating for everyone, or extra storage with deep drawers on both sides. Some islands become the cooking station, with a cooktop and rangehood built in, and others work as a servery that links the kitchen to the dining and living area.
Decide which of these matters most for your home. A family that cooks big meals every night needs a very different island to a couple who mostly entertain. That one decision shapes the size, the layout and the budget, so it’s worth settling before anything else.
This is where most island dreams meet reality. An island needs space around it just as much as it needs space on top.
The gap between your island and the surrounding benches decides whether the kitchen feels generous or cramped. As a rule, aim for about a metre of clearance on each side, and never less than 900mm.
Leave closer to 1200mm on the side where you’ll stand to cook, or where two people need to pass each other. And don’t forget that the drawers, the dishwasher and the oven all need room to open fully, on both the island and the run behind it. Squeeze these gaps and even a beautiful island will feel awkward every single day.
Bigger isn’t always better. A huge island looks impressive in a showroom, but if you can’t reach the middle to wipe it down, it stops being practical. A useful island usually starts around 1000mm deep by 1800mm to 2000mm long.
If you want to fit seating, storage and a sink, add length rather than depth, and keep the depth reachable, generally under 1200mm unless you can get to it from both sides. The best island is the one that fits your room and your reach, not the biggest one that will physically fit.
“People come to us wanting a big island. What they really want is the right island. We start by asking how the family actually lives, then design around that. Get the size and the flow right first. The stone and the styling come after.”
That’s the advice of Phil Watson, owner of Select Kitchens and a qualified cabinetmaker with more than 25 years in the trade, and it’s the principle behind every island the team designs.
An island with stools is one of the great pleasures of an open kitchen, but only if the seating is comfortable, and two numbers decide that: overhang and spacing. For knees to fit under the bench, allow around 300mm of overhang on the seating side, and support anything larger with brackets or a steel plate so the stone doesn’t crack over time. For elbow room, give each stool about 600mm of width, which means a 2 metre island comfortably seats three people, not four.
Height matters too. Bench-height seating, at around 900mm, keeps everything on one level and looks seamless, while a raised bar at around 1050mm to 1100mm hides bench mess from guests and creates a natural divide. Choose bench height for a clean, modern look, or a raised bar if you’d rather screen the working side.
Choose the stools themselves last, once the bench height is locked in. Backless stools tuck fully under the bench and keep sightlines clean, while stools with a low back or arms are kinder for long dinners. Allow roughly 250mm to 300mm between the seat and the underside of the benchtop for legroom, and match the finish to your hardware and lighting rather than the cabinetry.
Deep pot drawers are more useful than cupboards for almost everyone, because they bring everything to you rather than making you crouch and reach into a dark corner.
Put a bank of drawers on the working side, and use cupboards or open shelves on the seating side for cookbooks and platters. If you cook a lot, mix the drawer depths: shallow for utensils and cutlery, deeper for pots, pans and the appliances you’d rather keep off the bench.
Putting the sink or cooktop in the island lets you face the room while you work, which is why so many people want it. Just weigh it up first. A sink means plumbing runs to the middle of the room, which adds cost.
A cooktop needs a rangehood above or a downdraft unit, plus clearance from any seating. And either one eats into your clear prep space, so make sure there’s still room to actually work.
If you’re weighing up induction versus gas for an island cooktop, CHOICE has independent, lab-tested reviews worth reading before you commit.
A few small touches earn their keep every day: integrated bins that keep rubbish and recycling hidden but close to the prep zone, a pop-up or under-bench power point for the kettle or a laptop, and an appliance nook at one end to keep the toaster and coffee machine off the main bench.
These are the details our Kitchen Cabinet Makers build in every day, and the ones clients say they couldn’t live without.
The benchtop is the island’s headline act. It’s the biggest surface in the kitchen and the one everyone touches, so it’s worth investing here.
A waterfall edge, where the stone runs down the sides to the floor, gives the island a solid, sculptural look that suits modern and Hamptons kitchens especially well. It does use more stone, so it adds to the cost.
Making the island a different colour or finish to the rest of the kitchen is one of the easiest ways to add character. A timber or deep-coloured island against pale perimeter cabinetry has been a favourite in Melbourne homes for years.
As for the surface itself, engineered stone is the popular all-rounder, durable and low-maintenance. Natural stone like marble is stunning but needs more care. And timber or butcher block adds warmth, which suits country and French Provincial looks. For a full rundown of surfaces and prices, see our Kitchen Benchtops guide.
An island is one of the bigger line items in a kitchen renovation, because it’s essentially a second run of cabinetry plus its own benchtop. As a rough guide, adding a quality island usually lands somewhere between $4,000 and $12,000, depending on its size, how much storage you pack in, and the benchtop you choose.
Three things move that number the most: the size and amount of cabinetry, the benchtop (a waterfall edge or natural stone lifts the price noticeably), and services, since plumbing for a sink or wiring for a cooktop all add trade costs.
Because it draws on cabinetry, stone and trades all at once, the island is also where a budget can quietly stretch, so it’s worth pricing as its own decision.
The upside is that a well-designed island is one of the features buyers notice most, so it tends to earn its keep at resale. For the full picture of where the money goes, see our Kitchen Renovation Cost Guide.
It’s also worth choosing energy-efficient appliances while you’re at it. The Australian Government’s YourHome guide shows just how much they affect your running costs.
An island deserves its own lighting, and it’s often an afterthought. Pendant lights over the island do two jobs: they light the bench for prep, and they anchor the island in an open-plan room. Hang them so the base sits around 700mm to 800mm above the benchtop, high enough to see across but low enough to light the surface.
For a 2 metre island, two or three pendants usually look balanced, spaced evenly along its length, and it’s worth matching their style to the kitchen: sculptural and simple for modern, glass or rattan for Hamptons, aged metal for French Provincial. Add task lighting under any overhead cabinetry too, so no one ends up working in their own shadow.
The right island changes completely with the look you’re after. In a modern kitchen it’s crisp and handleless, with a waterfall edge and everything integrated. A Hamptons Kitchen island is a shaker-profile piece in soft white or blue, topped with stone and lit by pendants above.
French Provincial leans ornate and furniture-like, with turned legs and an antique finish, while a Country Kitchen island is warm timber or butcher block that anchors a relaxed, family space. Still deciding on a look? Browse all of our Kitchen Styles for inspiration.
Not every kitchen can fit a full island, and forcing one in is a common mistake. If your space is tight, a peninsula is often the answer: attached to a bench or wall at one end, it gives you seating and prep without the clearance a full island needs.
A slimline island, shallower than standard, still works for prep and a stool or two, and a mobile island or butcher’s block gives you a surface you can move as needed.
A good designer will tell you honestly whether an island suits your space, or whether one of these works better.
A few pitfalls we see again and again. Avoid these and you’re most of the way to an island you’ll love for years.
The perfect island is the one designed around how your family actually lives, and that’s exactly where we start. For 25 years, our team has designed and built custom kitchens across Melbourne, all made in our own factory and installed by one team.
If you’re planning a Kitchen Renovation, book a Free In-Home Design Consultation and we’ll help you shape an island that works beautifully for your home. Want to see the numbers first?

Fill in the form or give us a call. We’ll be in touch to lock in a time that suits you.